

Snack boards are a fabulous way to feed a crowd – but they’re great for small events, too! So I wanted to share one of my favorite ways to present appetizers at smaller gatherings: a simple, small charcuterie board with cheese, vegetables, meats, nuts, and more.
I absolutely love charcuterie boards – they are so fun and can essentially be works of art, but while they may look super fancy and complicated they can be quite easy to put together if you follow a simple formula.
Here’s how to build a small cheese board, step by step, so you can be a fabulous host without all the stress of prepping and cooking a ton! 🙂
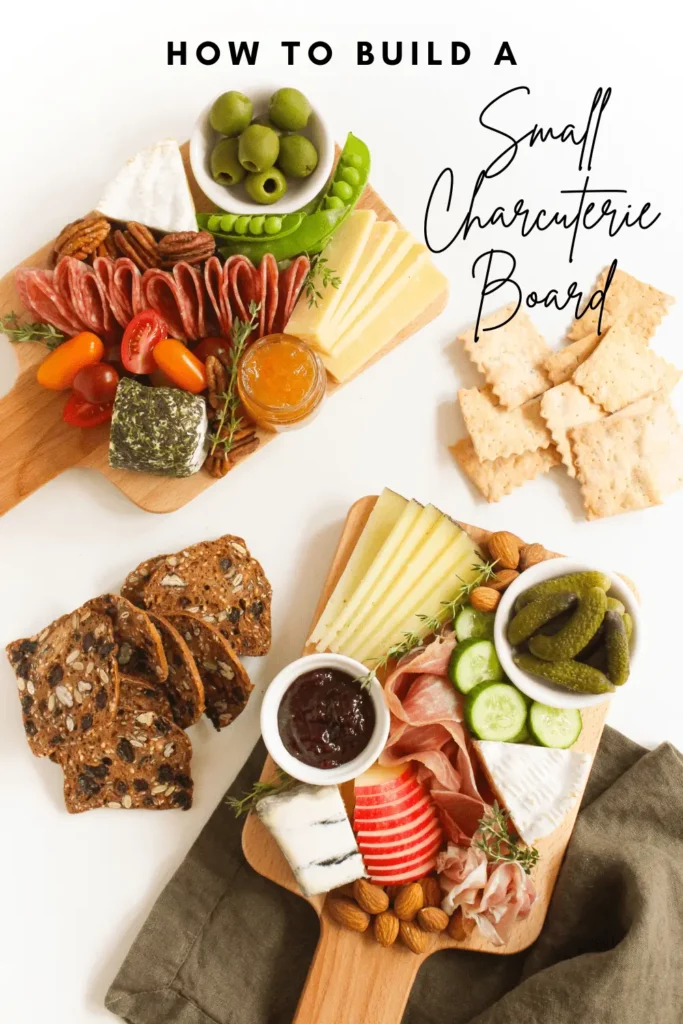
Table Of Contents
Small Cheese Board
A charcuterie board is the perfect appetizer. It’s easy to customize based on your tastes, there’s a variety of items for even the pickiest of guests, and it doesn’t require any cooking!
Plus, you can easily choose items for your board to match the current season, with different fruit jams, fresh or pickled vegetables, and cheeses.
In this post, I’m walking you through tips and tricks for setting up your board (step by step), so you can easily make a gorgeous charcuterie board (while still keeping it simple!).
How to Make a Simple Charcuterie Board
In addition to walking you through the steps of building an attractive charcuterie board, I’ll be sure to share tips and tricks for arranging it. I’ve also included examples of what you can use for each category (specific types of cheeses, meats, etc.).
This is just for inspiration, of course – feel free to make it your own!
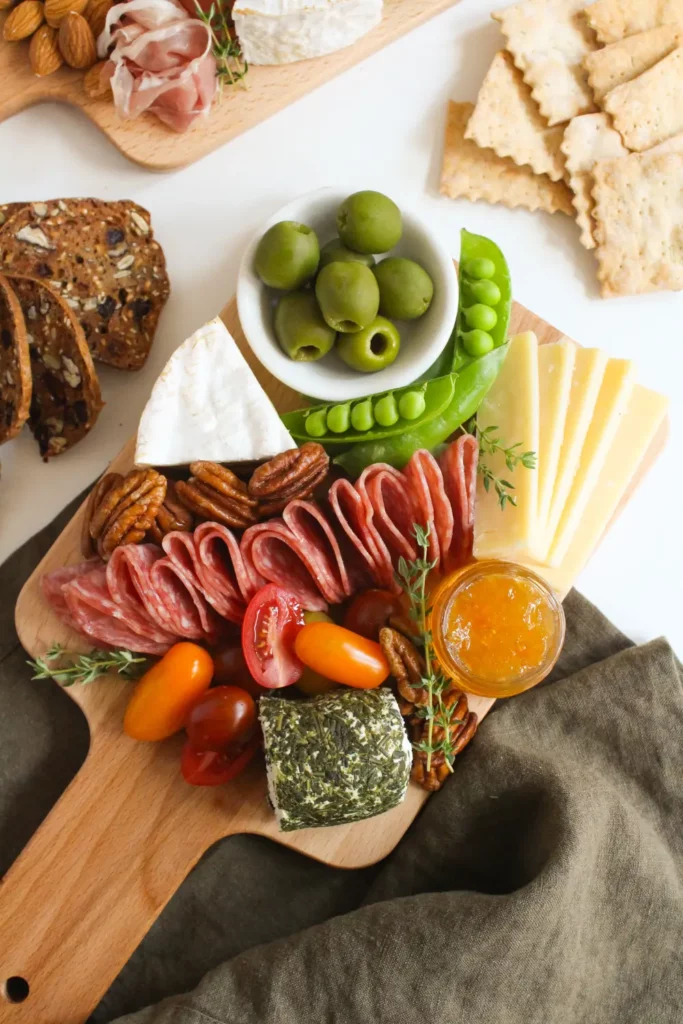
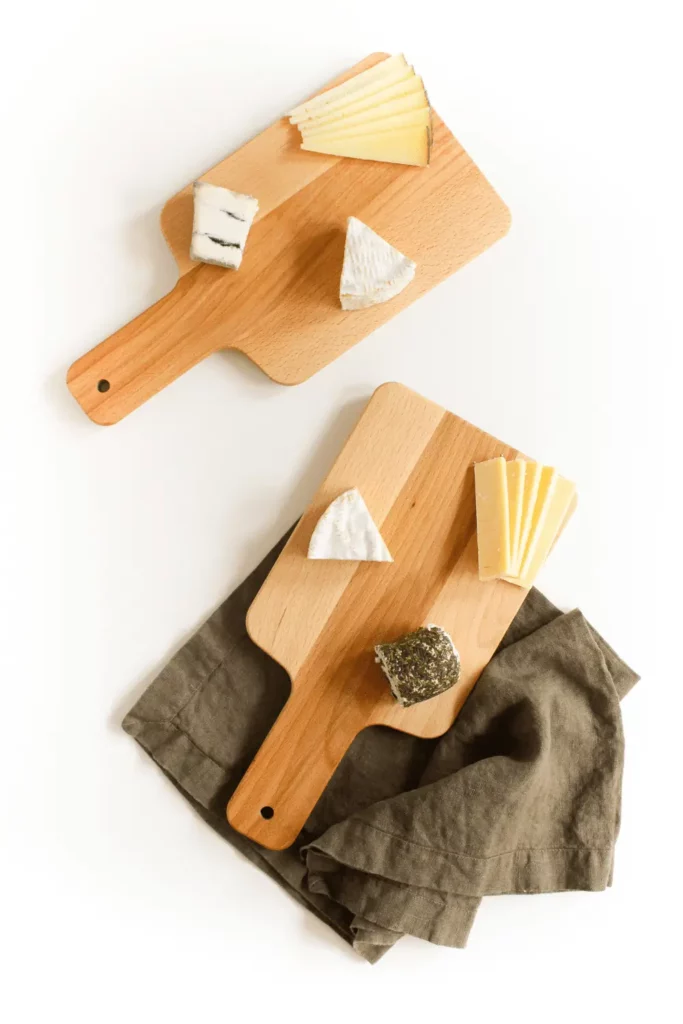
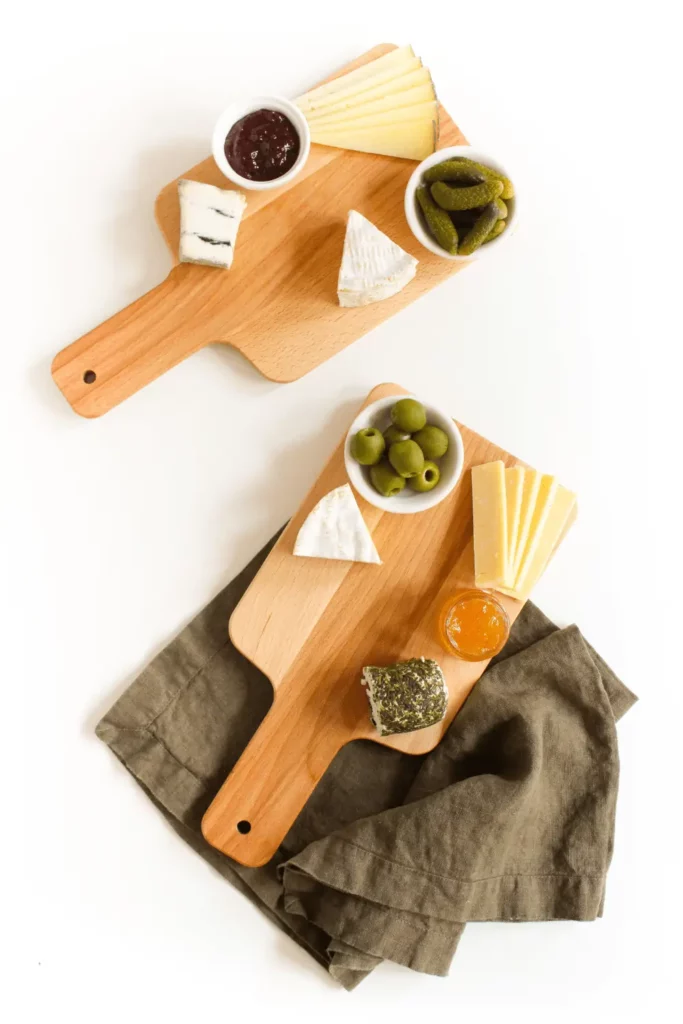
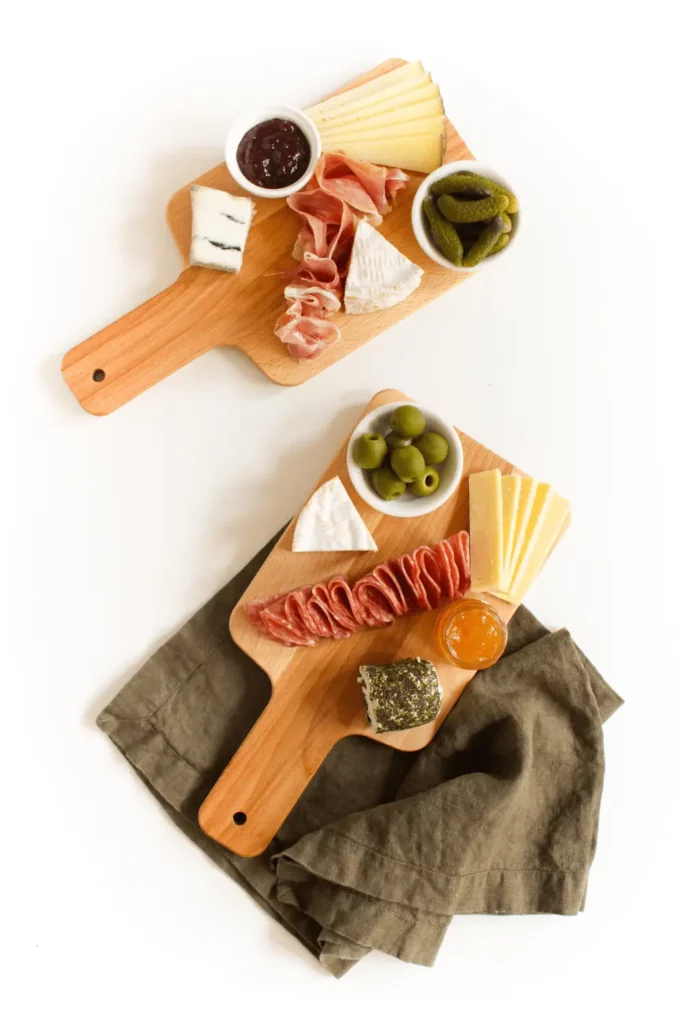
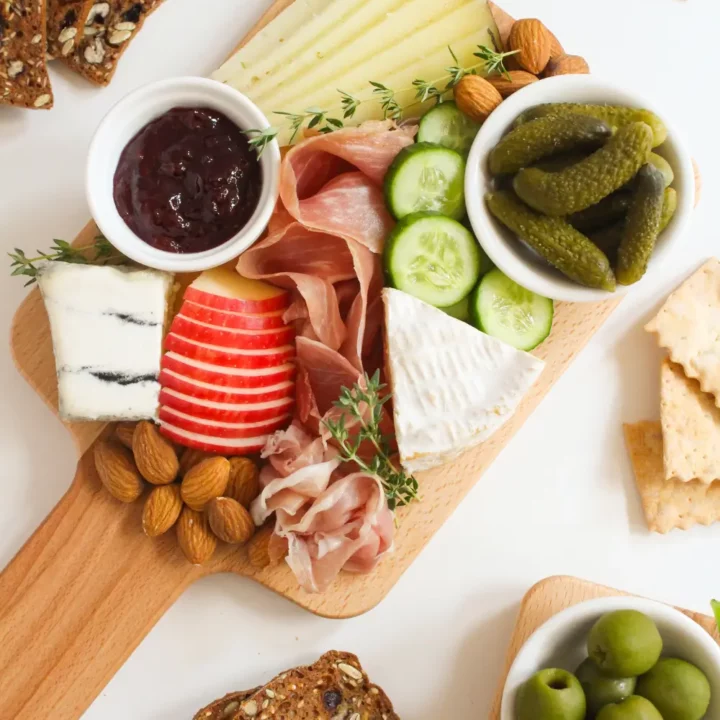
Step 1: Start with Cheese
Cheese will be the anchor of your board. Go with 2-3 cheeses and place them on opposite corners of the board or in a triangle. It’s best to use a variety of types of cheese, like:
- A hard cheese that can be sliced before placing on the board (examples: white cheddar, manchego, asiago, emmental, comte, gruyere)
- A soft cheese that can be placed whole or in a wedge on the board and served with a small knife (examples: brie, camembert, goat cheese, burrata)
- A “wildcard” cheese that’s a little funky or is flavored with herbs/spices/etc. If using a hard “wildcard” cheese, slice before placing on the board, otherwise place it on there whole!
Ideas for fun wildcard cheeses are: blue cheeses (like gorgonzola, cambozola, or roquefort), herbed chevre (goat cheese), cranberry white cheddar, smoked cheeses (gouda is one of my faves), aged cheeses, etc.
Ask the cheesemonger at the grocery store for new things to try!
Step 2: Add Jams/Condiments & Pickled/Salty Items
Add a jam or condiment and pickles or salty items in small bowls. Place them in the large open gaps on the board near the edges of the board.
- Jams and condiments can be sweet or savory. (Examples: fig/cherry/peach/other fruit jams, savory/spicy tomato or pepper jam, hummus, fancy mustards, etc.)
- I like to head to the pickle/olive bar at Whole Foods for salty items to grab a variety without having to buy large quantities. (Examples: mixed or marinated olives, cornichon pickles, pickled peppers, marinated artichokes)
- Nuts can also go in small bowls if you’d like, or add them directly onto the board in a later step (more on that in a minute).
Step 3: Add Meat
Create a “river” of folded salami or prosciutto diagonally through the board.
- To fold salami: start with thinly sliced salami, not thicker pieces like summer sausage. (Thicker pieces of sausage can also be used to create the “river,” the pieces just won’t be folded!). Fold each slice in half, then half again to create a quarter-circle. Arrange the salami in a line, alternating the open edges and folded edges.
- To arrange prosciutto: cut or tear each slice of prosciutto in half and gently bunch it up, then arrange in a line.
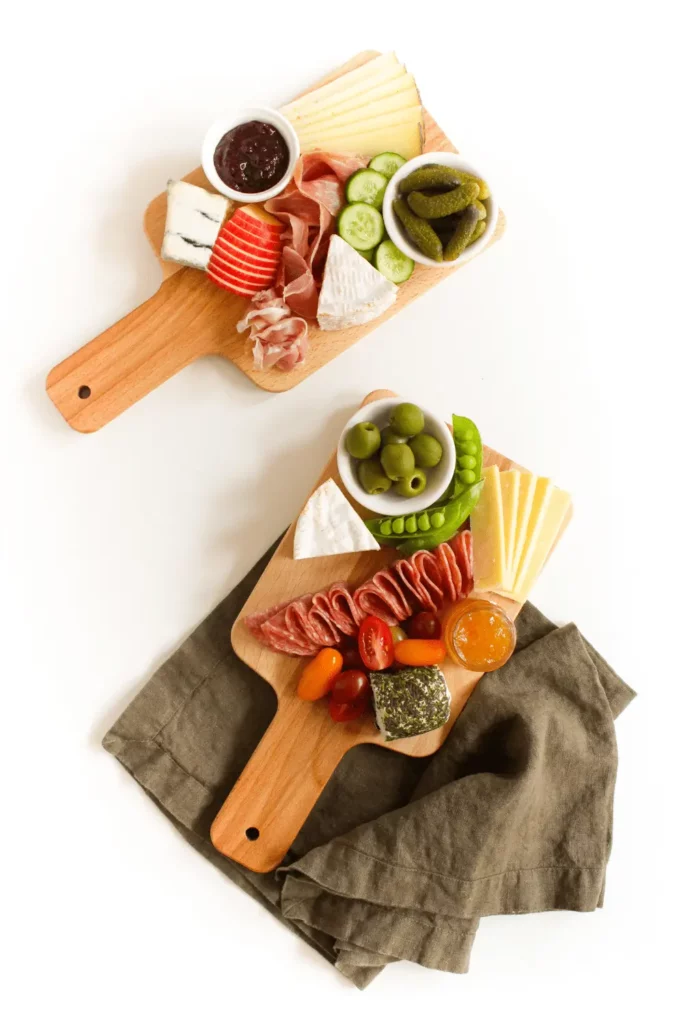
Step 4: Add Fruit & Veggies
Fill in any large gaps with fresh fruits and/or vegetables.
- Crunchy, colorful fruits and veggies that aren’t too juicy work best. (Examples: sliced baby cucumbers, halved cherry tomatoes, sugar snap peas, radishes, berries, sliced apple or pear, halved figs, etc.)
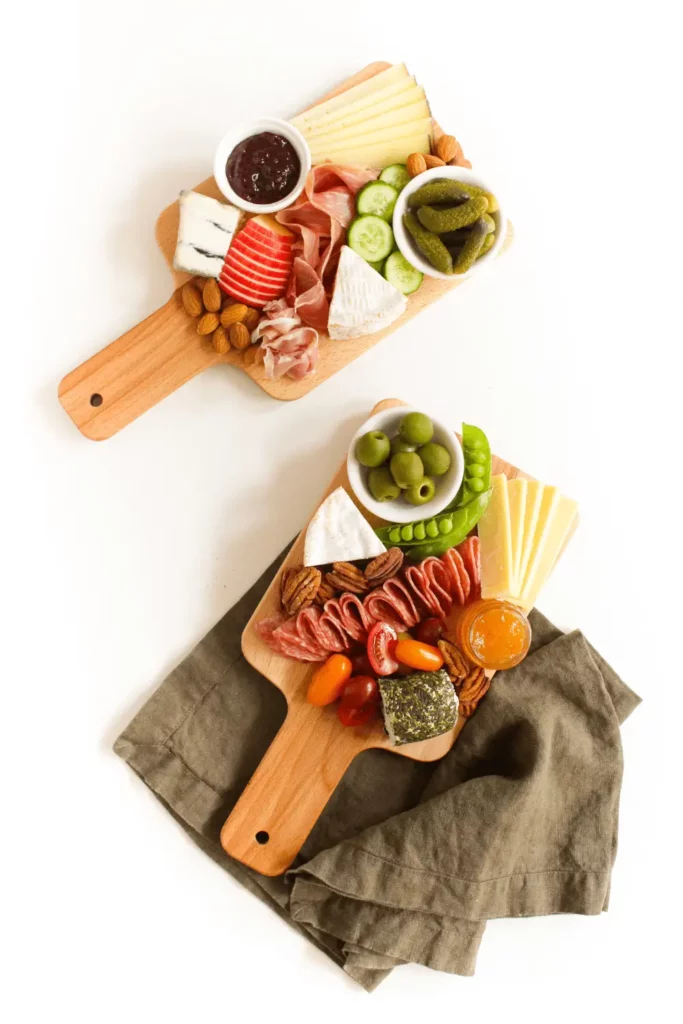
Step 5: Add Nuts & Dried Fruit
Fill in any smaller gaps with nuts and/or larger dried fruit.
- Examples: almonds, pecans, peanuts, walnuts, pistachios, dried apricots, dried figs, etc.
- If you prefer having your nuts in small bowls, you can skip this step and continue to fill the gaps with fresh fruit, dried fruit, or veggies.
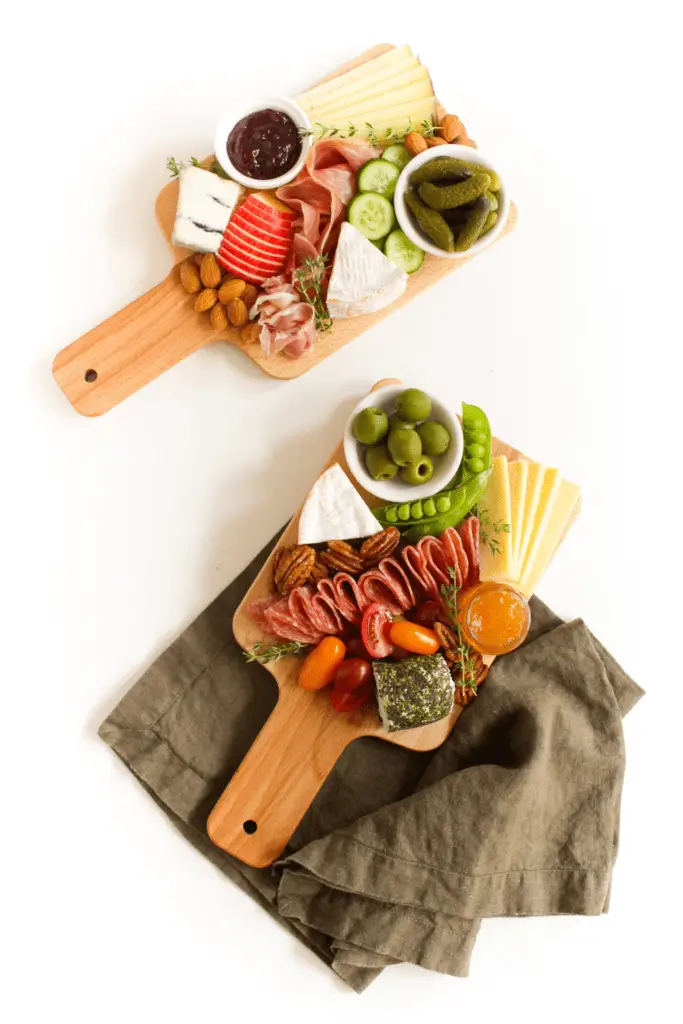
Step 6: Garnish With Fresh Herbs
Garnish with a couple small sprigs of fresh herbs or edible flowers. This step is optional, but it really ups the “wow” factor of the board!
- Hot tip: use herbs with small leaves like thyme/rosemary or small leaves of herbs like basil or mint. (Large leaves will cover too much of the good stuff underneath!)
Step 7: Add Crackers & Serve
Serve with crackers!
If you’re making a larger board, you can place crackers directly on the board arranged in another “river” parallel to the meat. But for these small boards, I like to fill them with cheese and toppings and serve the crackers on the side.
- Use one “wildcard” cracker with dried fruit/nuts or other spiced/flavored crackers, and one or more “plain” type of cracker like water crackers, olive oil crackers, etc.
Another idea is to serve with a warm, pre-sliced baguette on the side!

Can you make a cheese board ahead of time?
Yes! Jams/condiments, cheese, and salty items can all be prepped on the board up to 24 hours (one day) ahead of time. Cover with plastic wrap and store in the fridge.
When ready to serve, be sure to let it sit at room temperature for about 30 minutes, then add fresh vegetables/fruits, meat, nuts, and crackers.
I hope this post helps you feel prepared for any event, whether you’re hosting for the holidays or having friends over for a low key wine night. 🙂 Enjoy!
Simple Small Charcuterie Board
Need an easy appetizer idea? Make a small charcuterie board with cheese, vegetables, meats & more! Here's how to build a simple cheese board.
Ingredients
- 2-3 wedges of cheese*
- 1/4 cup jam or other condiment (mustard, hummus, etc.)
- 1/4 cup pickles, olives, or other salty item
- 10-12 pieces of salami or prosciutto
- 1/2 cup fresh fruit or vegetables**
- 1/4 cup nuts or dried fruit***
- 2-3 handfuls of crackers (2 different types)
- optional: garnish with fresh herbs
Instructions
- Place cheese on opposite corners of the board or in a triangle.
- Add your jam/condiment and pickles/salty item in small bowls in the open gaps on the board near the edges.
- Create a "river" of meat diagonally along the board.
- Fill in any large gaps with fresh fruit or vegetables.
- Fill in smaller gaps with nuts or dried fruit.
- Garnish with fresh herbs if desired.
- Serve with crackers!
Notes
*a hard cheese, a soft cheese, and a "wildcard" cheese that's a little funky or is flavored with herbs/spices/etc.
**Crunchy, colorful fruits and veggies that aren't too juicy work best (examples: sliced baby cucumbers, halved cherry tomatoes, sugar snap peas, any berries, sliced apple or pear, halved figs, etc.)
***examples: almonds, pecans, walnuts, pistachios, peanuts, dried figs, dried apricots, etc.
For fresh herbs: use herbs with small leaves (like thyme/rosemary) or small leaves of herbs like basil or mint.
For making ahead: Add jams/condiments, cheese, and salty items on the board up to 24 hours ahead of time. Cover with plastic wrap and store in the fridge. When ready to serve, let it sit at room temperature for 30 minutes. Then add fresh vegetables/fruits, meat, nuts, and crackers.