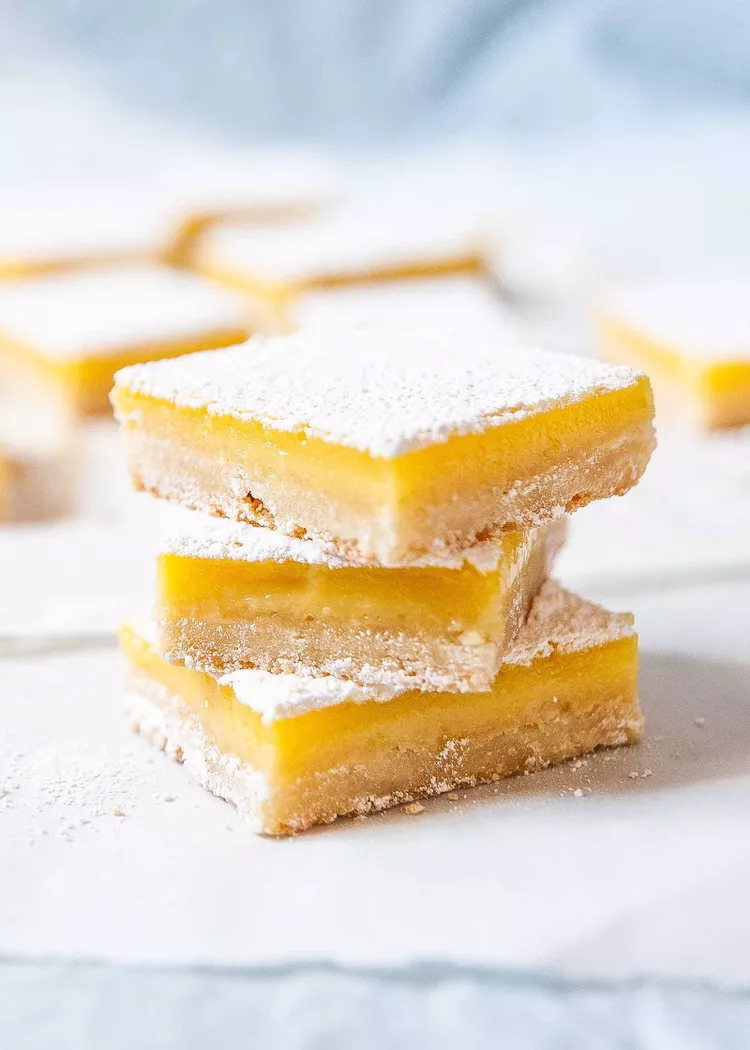
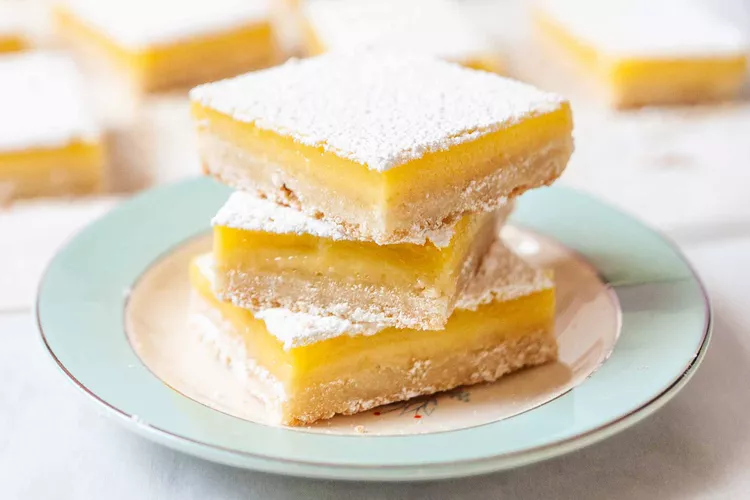
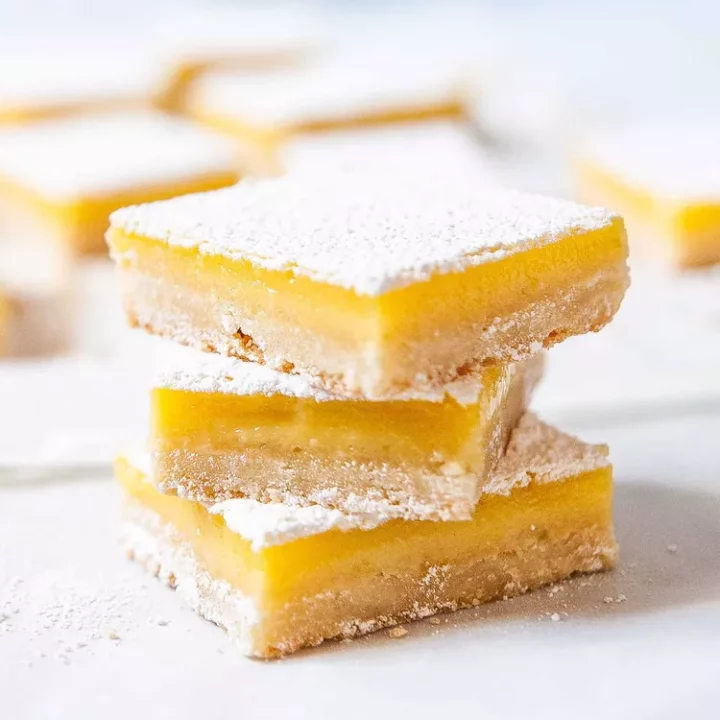
If you LOVE lemon, these Classic Lemon Bars are for you! Tart, velvety lemon curd is balanced by a crisp, buttery shortbread crust. Happiness is only 45 minutes away!
Lemon bars are to dessert what Tigger is to Winnie the Pooh. You’d be hard-pressed to find a friendlier, more accessible, sunshine-y, or more extroverted sweet treat.
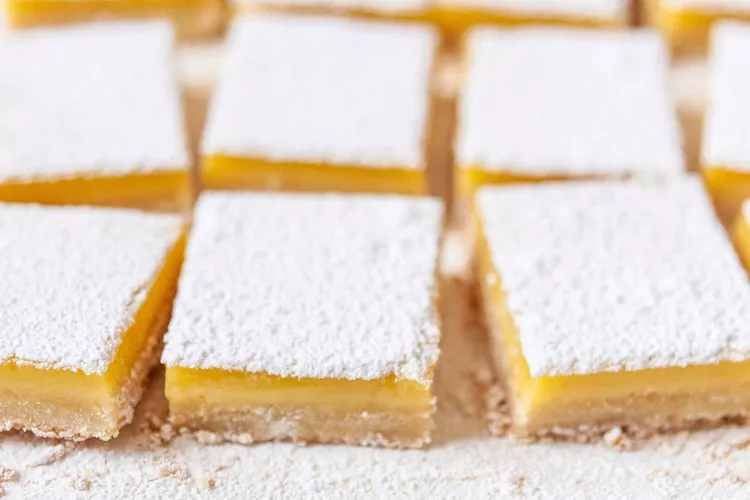
The perfect bars for me and my family pack a pucker that’s tamed by a slightly sweet, buttery, and crisp shortbread crust. The lemon curd is firm enough to hold its shape when cut, but still rich and creamy like pudding.
Table Of Contents
Making Easy Lemon Squares
Lemon bars are made in two steps: the shortbread crust and the lemon curd filling. Here’s what to do:
- First: Blind bake the crust until it looks dry and is slightly golden around the edges.
- Second: Pour the filling directly onto the warm crust and bake until it’s set, but not spongy. The filling should have very small bubbles across the top and not jiggle.
The baked curd can go from done to over done in a matter of minutes, so it’s important to stay by the oven during the final bake until you know how the recipe performs in your kitchen.
Glass vs Metal Baking Dish
If you use a glass baking dish, use the longer cooking times of 25 minutes for the crust and 12 minutes for the curd.
If using a metal baking dish, both the crust and the curd will cook more quickly. Use the shorter cook times of 20 minutes for the crust and 10 minutes for the curd.
How to Cut and Serve Lemon Bars
This is really just for clean lines. If you aren’t persnickety about presentation, let the bars cool on the counter for about 20 to 30 minutes then dive in!
If, however, you want that crisp, clean line of shiny yellow curd with each slice, it’s best to do what your mother told you, and practice patience:
- Cool the bars on the wire baking rack for 30 minutes, followed by 30 additional minutes uncovered in the refrigerator.
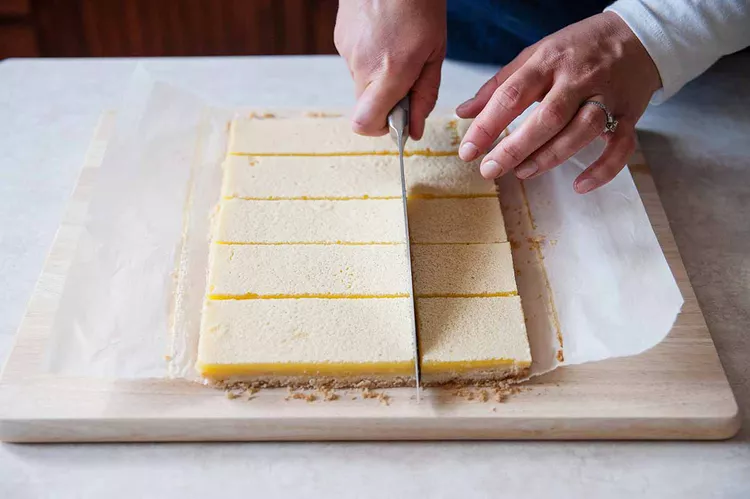
- Once cold, run your knife around the edge of the pan. Use the parchment sling to lift the entire slab of lemon bars onto a cutting board.
- Use a long knife to cut your desired lemon bar shape—squares, rectangles, or triangles. For uniform shapes, trim the outer edge by 1/8 of an inch before cutting into bars.
- When cutting, don’t drag the knife through the bars. Press from the top down. Wipe your knife clean between slices.
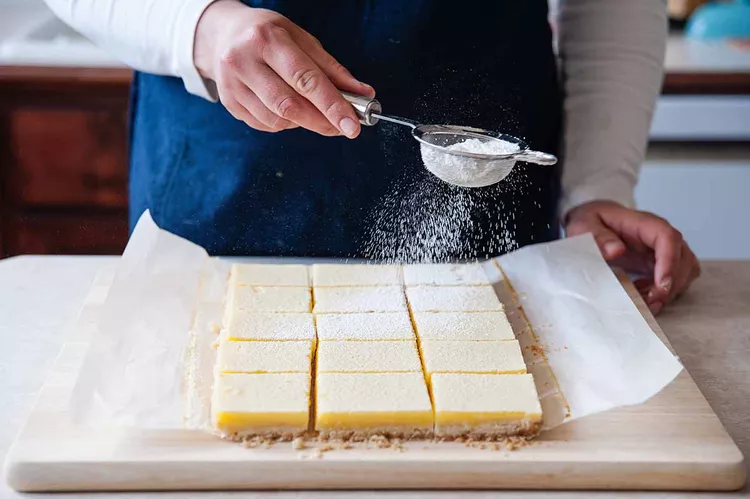
Dust with powdered sugar just before serving. If you dust with sugar too early, the sugar will absorb into the bars and look slimy.
How to Store Lemon Bars
If you’re planning to eat your lemon bars same day, then by all means put them in a container on the counter, and nibble away to your heart’s content.
However, if you want to make them ahead and take them to a friend’s place, then it’s best to follow a few rules.
To Take to a Party
- Keep the entire pan, uncut, in the fridge for three days. Cover with foil.
- Cut and dust with powdered sugar just before heading to your soiree!
To Store at Home
- Cut into shapes.
- Store in the fridge in a single layer in a container with a lid for up to five days. If you need to layer them, put a sheet of parchment paper between layers.
- Dust with powdered sugar on an as-needed basis.
How to Freeze Lemon Bars
If you’d like to freeze lemon bars for later, place the baked and cooled lemon bars in a single layer inside your container; cover with a sheet of parchment paper; then add a second layer. Followed by another piece of parchment. The parchment prevents ice crystals from forming on the curd. Don’t add more than two layers, or you could smoosh the tender lemon curd.
Frozen lemon bars will keep for up to one month. To thaw, put them in the fridge or set them on the counter for about 40 minutes. Dust with powdered sugar just before serving.
Troubleshooting Lemon Bars
Why is my lemon curd grainy?
- In the case of baked lemon bars, the most likely culprit is unincorporated flour. Whisk well, my friends. Whisk well.
Why didn’t my lemon curd set? Why is my curd runny?
- If you doubled the recipe and didn’t adjust the cooking time appropriately.
- You didn’t let it cool long enough. Curd continues to firm up as it cools.
- For this recipe, we’re adding flour to the curd, and baking it. Both things help the curd hold its shape.
How can I make the lemon curd layer more firm?
- The best way to firm up lemon curd is to cool it. Place it in the fridge.
- If you’ve already baked it, already cooled it, and it’s still not firm, tell everyone you meant to do that, and serve it in bowl with a dollop of whipped cream! OR start over, add an extra tablespoon of flour to the curd, and bake it for longer.
Classic Lemon Bars
Instructions
Ingredients
For the crust:
- 2 1/4 cups (284g) all-purpose flour
- 2/3 cup (152g) granulated sugar
- 1 teaspoon kosher salt
- 1 cup (2 sticks) unsalted butter, cold
For the lemon filling:
- 4 large eggs
- 1 egg yolk
- 1 cup (219g) sugar
- 1/3 cup (43g) all-purpose flour
- 2/3 cup lemon juice (from 3 lemons)
- 1 teaspoon vanilla extract
- 1/4 cup unsifted powdered sugar
Instructions
1. Prepare the pan and preheat the oven:
Line a 9x13 pan with parchment paper, leaving enough parchment paper to overhang the sides on the long end of the pan. You will use this to lift the bars out of the pan and cut them at the end.
Preheat the oven to 350° F.
2. Combine the dry ingredients:
In a large mixing bowl, whisk together flour, sugar, and salt.
3. Add the butter:
Cut the cold butter in cubes. Toss the cubes in flour. Pinch and smoosh the flour and butter together between your thumbs and fingers until the butter is coated with flour and broken into the flat butter pieces, between the sizes of smooshed almonds and peas. (Alternatively, you can blitz it in a food processor 6 or 7 times until the butter has a similar visual appearance.)
4. Bake the crust:
Dump the crust into your prepared baking dish, press it down firmly it into an even layer with your fingers, and place in the oven.
Bake for 20-25 minutes. The crust is ready when it looks dry and is slightly golden at the edges.
5. When the crust only has about 10 minutes left to bake, make your filling:
In a medium bowl, whisk together the eggs, yolk, and sugar. Whisk in the flour until you no longer see clumps. Whisk in the lemon juice and vanilla.
6. Bake the lemon bars:
When the crust has finished baking, remove it from the oven and pour the curd over the warm crust. Return to the oven.
Bake for 12 minutes in a glass pan or 10 minutes in a metal pan. The filling is ready when it doesn’t jiggle and has lots of little bubbles on top. All ovens are different, so start checking 2 minutes before you think it’s ready. Don’t over-bake it, or the filling will be spongy.
7. Cool and cut the bars:
Remove from oven and let cool for 1 hour, uncovered, either on the counter or in the refrigerator. Use the parchment sling to lift the bars onto a cutting board. Cut into squares and dust with powdered sugar.