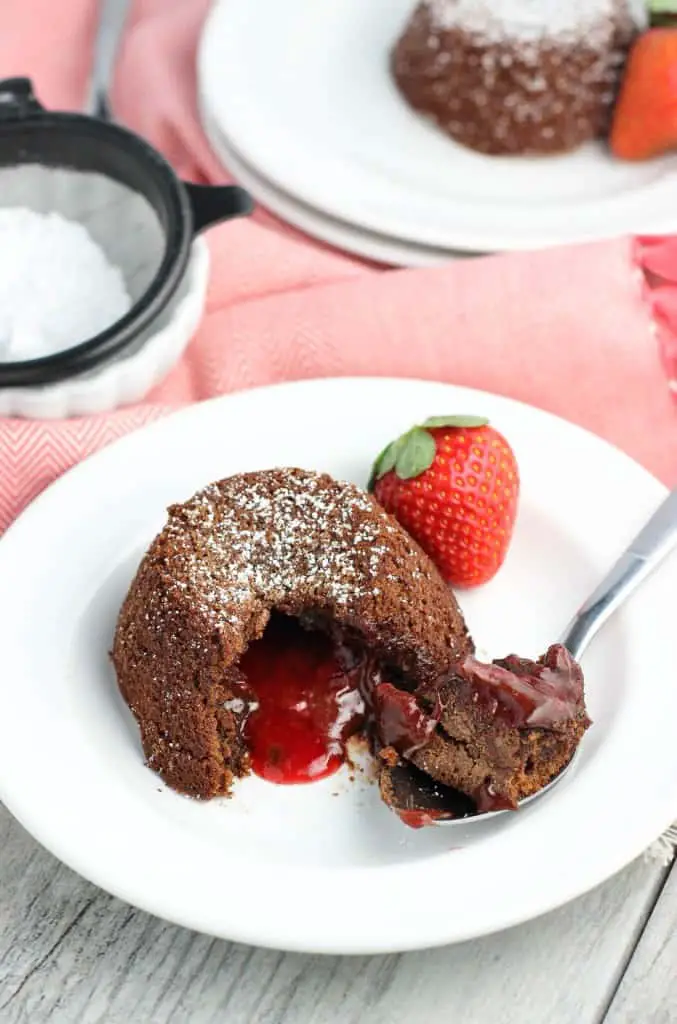
These mini chocolate strawberry lava cakes feature a rich molten chocolate and strawberry center and are EASY to make. This small-batch recipe yields just four mini lava cakes (and uses a muffin tin).
These mini chocolate strawberry lava cakes come as a semi-sharp contrast from the healthier eats that have been gracing the blog lately. That I know.
But I’m a whole-hearted believer in everything in moderation, and I think a chocolate dessert after days of kale, lean protein, whole grains, and remembering to take my vitamins is well deserved. Plus it’s a mini dessert, which helps in the sweets justification.
Chocolate covered strawberries hold such significance in my memories, besides just being delicious. Right after college I flung myself into CPA exam preparation. A week after graduation I put on my special study sweatpants and parked myself on the couch for a few months (and then any time not at work after that).
There are four sections (meaning four exams) throughout the thing, and with my highly-developed capability for worrying, you can imagine my nerves on and before exam days. Oooof.
So nervous, that my rock star dad drove me the half-hour to the exam center so I could try and calm myself before the big event. After all was said and done I would joyously skip to the car, and without fail he’d have a few chocolate covered strawberries sitting on the passenger seat for us to devour in celebration.

Needless to say the flavor combination of chocolate + strawberry is still one of my favorites, long after those exams were over (and let me tell you, a big YES to that). Nowadays I like to enjoy chocolate covered strawberries for other types of celebratory occasions, like Valentine’s Day, date night, or just whenever.
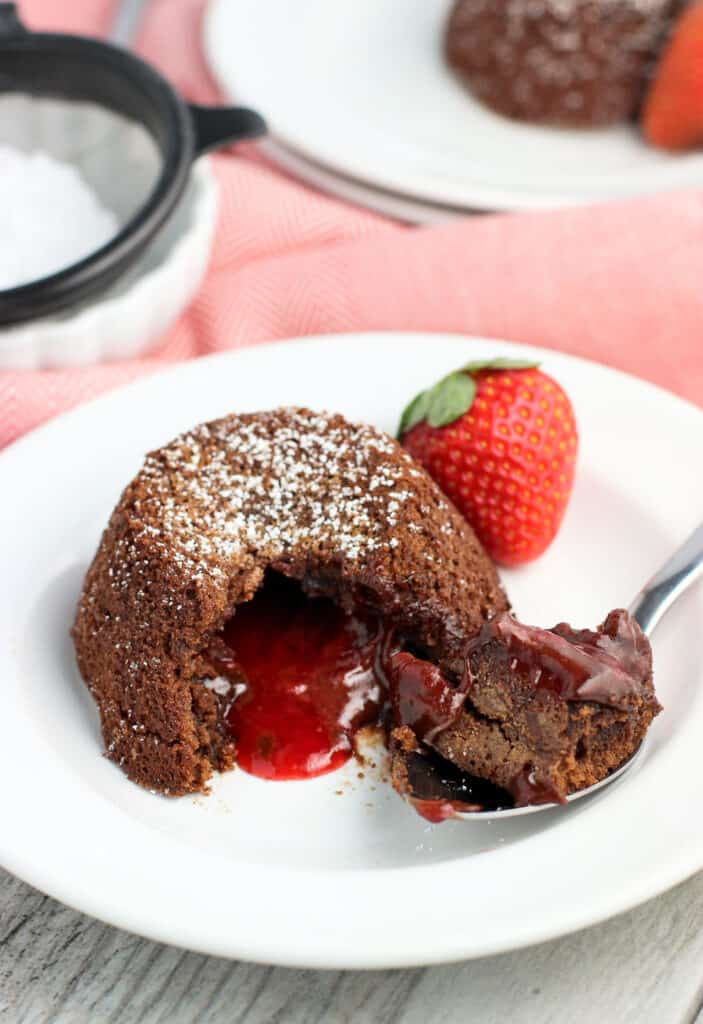
These chocolate strawberry lava cakes are richly flavored and individually-sized, which works out nicely with the whole portion control thing. Plus would you believe they’re surprisingly simple to make?
Lava cakes are one of those desserts that I always assumed were designated as dinner-out treats only. So fancy! I totally can’t figure out that molten center at home without cursing at least three times and making a colossal mess, right? Wrong.
Table Of Contents
What you’ll need
In addition to being surprisingly easy to make, the ingredients isn’t anything fancy, either. To make these lava cakes, you’ll need:
- Unsalted butter
- Semi-sweet chocolate chips
- All-purpose flour
- Confectioners’ sugar
- Instant expresso powder
- One whole egg plus one egg yolk
- Vanilla extract
- Strawberry preserves/jam
Recipe instructions
Start by melting together the butter and chocolate chips in a small pan on the stovetop. Then whisk together the flour, confectioners’ sugar, and espresso powder in a bowl. Add the egg, the egg yolk, and the vanilla and whisk to combine.
Stir in the melted butter and chocolate mixture, and there you go! Somehow while baking, the molten center forms while the exterior bakes into a cake. Lava cake magic.
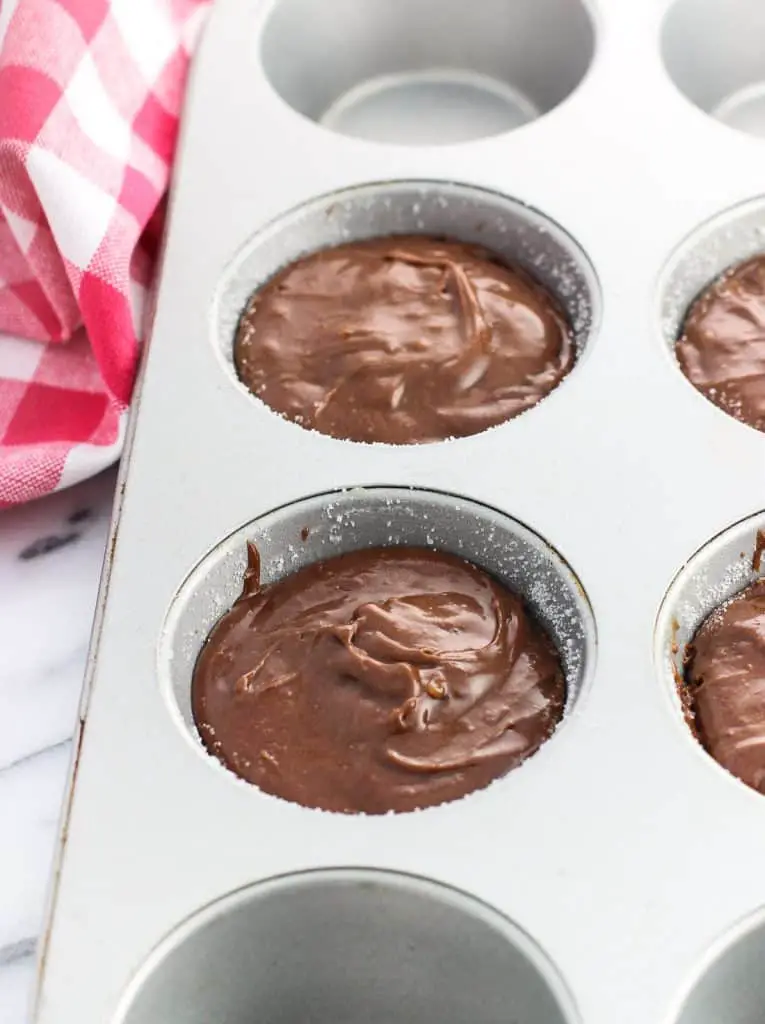
Grease four muffin tin cups (in a two-by-two pattern) with butter, then sprinkle a little bit of granulated sugar in each cup to coat the bottom and sides. This helps the lava cakes release. Evenly distribute the lava cake batter into each of the prepared cups.
This version features something extra special in the form of strawberry preserves, which join with the molten chocolate goodness to make a truly decadent strawberry lava cake. Top each cup of lava cake batter with one tablespoon of strawberry preserves, then use a spoon or spatula to cover up the preserves with the batter.
All that’s left is to bake! Around 11-12 minutes will do it. Look for the outer edges of each lava cake to look drier while the cake appears to puff up. The very center may still look a bit sunken in, but that’s because of the preserves.
Let the strawberry lava cakes sit in the pan for five minutes once they come out of the oven, then loosen the edges and carefully invert the pan over a plate. Dust with confectioners’ sugar or serve with a scoop of ice cream (yum), and enjoy while warm.
Recipe notes
- To make it easier when you invert the cooked lava cakes on to a plate, I suggest using four muffin cups that are in a square: two in one row and the two right below them.
- Measure flour with the “spoon and level” method. Stir the flour in the bag/container to fluff it up. Spoon flour into your dry measuring cup, making sure not to pack it in. Using a straight-edge (I like to use the straight handle of the spoon), level off the flour in the measuring cup, with the excess falling back into the bag/container. This prevents too much flour from being added to the recipe, which can lead to drier baked goods.
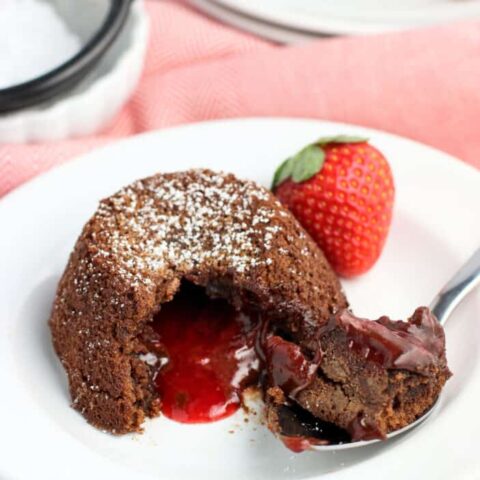
Mini Chocolate Strawberry Lava Cakes
These mini chocolate strawberry lava cakes feature a rich molten chocolate and strawberry center and are EASY to make. This small-batch recipe yields just four mini lava cakes (and uses a muffin tin).
Ingredients
- 1 teaspoon granulated sugar for dusting muffin tin cups
- 4 tablespoon unsalted butter
- ½ cup semi-sweet chocolate chips
- ¼ cup all-purpose flour
- ½ cup confectioners' sugar
- ½ teaspoon instant espresso powder1 egg plus 1 egg yolk
- ½ teaspoon vanilla extract
- ¼ cup strawberry preserves or jam
Instructions
- Preheat oven to 400°F. Generously butter four cups of a standard-sized muffin tin (in a two-by-two square arrangement) and sprinkle each with a bit of granulated sugar to coat the bottoms and sides.
- Add the butter and chocolate chips to a small saucepan and heat over low heat, stirring until the mixture is melted and smooth. Remove saucepan from heat and let it cool for a few minutes.
- Whisk together flour, confectioners' sugar, espresso powder, whole egg, egg yolk, and vanilla extract in a bowl until evenly mixed and creamy. Whisk in melted and slightly cooled butter/chocolate mixture.
- Pour mixture evenly between four prepared muffin cups. Add about 1 tablespoon of strawberry preserves to the center of each lava cake. The batter will be fairly thick, so you may need to press the preserves into the center of each with a spoon or a spatula. Using the spoon/spatula, smooth some of the lava cake batter over top of the preserves, which are now under the surface. You shouldn't see much of the preserves, if any at all, once done.
- Bake for 11-13 minutes, or until the tops have firmed/stiffened up and the edges have browned. You'll notice the outside edges will begin to appear "drier" as they bake, which will continue inward as each lava cake puffs up slightly. The center of each may still appear sunken in a bit due to the preserves.
- Once done, remove from oven and let sit for 5 minutes. Carefully loosen the edges of each lava cake with a knife and invert onto a plate. Sprinkle with confectioners' sugar if you like (and/or vanilla ice cream) and serve immediately.
Notes
The butter/chocolate mixture is cooled slightly to reduce the risk of the warmth "cooking" little bits of the cold egg/egg yolk when the two are combined. You can get around this by bringing the egg and egg yolk to room temperature before beginning, or you can let the mixture cool for 5-10 minutes.
Don't stress when it comes to adding the preserves - it's not a precise science. The magic of lava cakes is that the molten center forms where it's supposed to be without much direction from you.
The nutritional info is estimated for one whole lava cake, though they work well as a dessert to be shared as well.
Nutrition Information:
Amount Per Serving: Calories: 357Total Fat: 19gSaturated Fat: 12gCholesterol: 128mgSodium: 34mgCarbohydrates: 40gFiber: 1gSugar: 31gProtein: 5g